In the previous post, we looked at what was involved in getting the shock surprise intro scene for Meetup Pop up and running. In the process, we saw a bunch of the CocosSharp classes in use, including sprites, nodes, actions and transitions. In this post, we'll deal with the final screen of Meetup Pop, the actual game screen.
Before we get into the code again, it's worth spending a bit of time discussing in more detail the flow of the game. It's very simple, but there are a few subtleties that might not immediately be obvious.
The rules of Meetup Pop
- the player starts with an initial number of lives
- if the players lives count is zero, it's game over
- balloons travel from the bottom of the screen to the top
- If the player does not pop a balloon before it reaches the top, lives count is decremented
- When the player pops a balloon, lives count is incremented
- balloons come in 'waves'
- waves consist of a random number of balloons between one and an upper limit. The upper limit starts at two and increases by one every five waves
- after each wave, the speed of the balloons is increased by 2.5% compounding. This doesn't sound like a lot, but it quickly increases the difficulty significantly!
- the background of the game changes based on how well the player is currently doing - brilliant green when lives are highest, dark and rainy when near game over.
Pretty basic. The cool thing about this ruleset is that we can implement its logic without having to manage the game loop frame-by-frame. CocosSharp certainly supports this method of logic programming (via the CCNode.Schedule method), but in our case, we can get by with smart use of CCActions.
Implementing the Game Scene
Based on the rules previously mentioned, we need to perform a few key tasks:
- Set up the game view and initalise starting values
- Launch waves of balloons for the player to tap
- Handle balloons being tapped and being missed
- Handle game over and resetting the game.
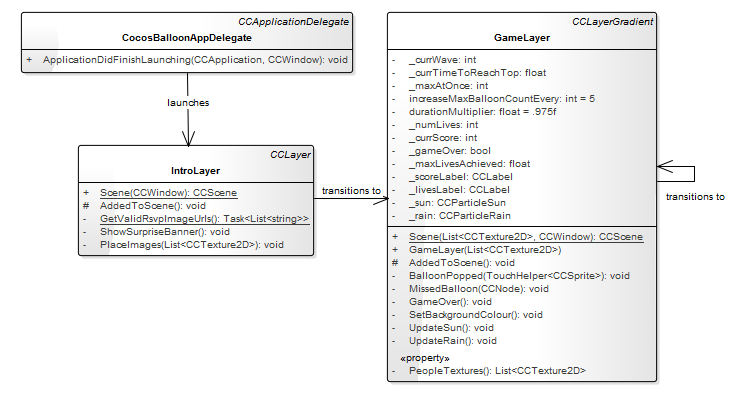
Looking again at the GameLayer class, you can see the variables that keep track of the game logic, and a few methods for handling events that occur - BalloonPopped, MissedBalloon, GameOver.
1. Setting up the game view
As with the intro scene, most of the magic happens in the AddedToScene override. In terms of setting up the scene, there's not a lot of work involved:
// add sun and rain particle effects
var topOfscreen = this.VisibleBoundsWorldspace.Center.Offset(0f, this.VisibleBoundsWorldspace.MaxY/2f);
_rain = new CCParticleRain(topOfscreen) { Scale = 0 };

this.AddChild(_rain);

// init labels
_scoreLabel = new CCLabel(String.Format("Score: {0}", _currScore), "Consolas", 18f) { Color = CCColor3B.Black }
    .PlaceAt(.1f, .05f, this)
    .WithTextAlignment(CCTextAlignment.Left);

_livesLabel = new CCLabel(String.Format("Lives: {0}", _numLives), "Consolas", 18f) { Color = CCColor3B.Black }
    .PlaceAt(1f - .1f, .05f, this)
    .WithTextAlignment(CCTextAlignment.Right);


SetBackgroundColour();
The new class in this snippet is the particle effect - CCParticleRain. Out of the box, CocosSharp comes with a number of particle effect generators, and you can define your own quite easily using a tool like Particle Designer. CCParticleRain is a builtin that will do just fine (and there are plenty more - CCParticleExplosion, CCParticleSun, CCParticleFlower, CCParticleFire and CCParticleGalaxy just to name a few). The rain effect is used to change the background of the screen when things are getting particularly dire - the worse the player's situation, the heavier the rain. Initially, the rain effect h6as a scale of 0 so that it is not visible. We also add labels for score and lives, nothing you haven't seen already. Finally, the SetBackgroundColour method is called for the first time. This method runs after every balloon is popped or missed and adjusts the background of the game to reflect the state of the player - bright green when things are going well, dark red when the player's life count is low. In combination with the rain, the effect adds a bit of character to an otherwise basic game.

2. Launching waves of balloons
The core logic for the game lives in a continuous while loop, that launches waves of balloons until the game over sequence has finished. When game over occurs, one final massive wave of balloons is launched for effect, so the loop has a little extra logic to handle that, most of which I have omitted, but it is fairly straightforward.
The wave loop performs the following actions:
    // determine number of balloons to fire
    // if game over, fire heaps for effect
    var numBalloons = !_gameOver ? r.Next(1, _maxAtOnce + 1) : 500;

    // generate the balloons
    var balloons = Enumerable.Range(0, numBalloons)
        .Select(_ =>
        {
            // pick a texture at random for the new balloon
            var randomIndex = r.Next(0, this.PeopleTextures.Count - 1);
            var randomTexture = this.PeopleTextures[randomIndex];

            // create sprite with touch handler
            return new CCSprite(randomTexture)
                .WithTouchHelper(h => h.TouchBegan
                                        .Where(__=> !_gameOver)
                                        .Subscribe(___ => BalloonPopped(h)));
        }).ToList();
First, the number of balloons to fire is determined. This is a random number between 1 and the current maximum number of balloons that can be launched based on the wave number (r is a local instance of System.Random). Note that if _gameOver is true, a lot of balloons are going to be generated.
Once the count is determined, the balloons are generated with a random texture each time, such that we should get a wave of varying meetup participants each time. A TouchHelper class is attached to the balloon that calls BalloonPopped when the balloon is touched, provided _gameOver is not true. TouchHelper is a class I wrote to help handle hit detection for CCNode instances. It's available in the meetup-pop repository but has the caveat that it does not account for scaling or other transforms you might apply to your CCNode. In this case, we don't do any of that so it is fine. We will go over the BalloonPopped method later in the article.
    // launch the balloons from the bottom of the screen
    var i = 0;
    balloons.ForEach(async b =>
    {
        // wait a little so that each balloons are slightly staggered
        await Task.Delay(TimeSpan.FromMilliseconds(50 * (++i)));

        // place under the screen
        var randomXPos = r.NextFloat().Between(.1f, .9f);

        b.PlaceAt(randomXPos, 1.1f, this);

        // create the launch action
        var timeToReachTop = _currTimeToReachTop.VaryBy(.15f); // use current duration with some variability
        var targetPoint = new CCPoint(b.PositionX, b.VisibleBoundsWorldspace.MaxY + 50); // move to a point above the top of the screen;

        var moveToTop = new CCMoveTo(timeToReachTop, targetPoint);

        // create the fail action; this runs after the balloon reaches the top of the screen
        // if the move action completes then this ballon was not tapped in time
        var failAction = new CCCallFuncN(MissedBalloon);

        // combine the move and fail in sequence
        var seq = new CCSequence(moveToTop, failAction);

        // launch the balloon
        b.RunAction(seq);
    });
Once the balloons have been generated, the next task is to launch them progressively from the bottom of the screen:
- The first part of this code snippet ensures that balloon launches are staggered.
- Each balloon is then assigned a random point along the width of the screen, excluding the first and last 10% (because it can be hard to touch objects at the extremes of the screen).
- The
PlaceAthelper is then used to place the balloon on the screen, at 110% of the height (because of the CocosSharp co-ordinate system, that is 10% below the bottom of the screen). - The point to which the balloon will fly and the time to reach the top is calculated, with some variability added.
- Finally the action to move the balloon to the top is created, this deserves a few words -
We use a CCMoveTo action, which takes a duration parameter and target point, and interpolates the travel between points. However, before we run the move action, we wrap it in a CCSequence which first executes the move action, then executes a CCCallFuncN action - an action that runs code - in this case the MissedBalloon method, which takes a life away from the player. As you'll see in the next section, we rely on the fact that the BalloonPopped method cancels the actions running on the balloon that was popped, preventing a life from being taken away when the player pops the balloon, but allowing us to use the sequence to save us from writing code to check whether balloons moved off the screen.
    // after each round, increase the difficulty by reducing the time
    // for balloons to reach the top
    _currTimeToReachTop = _currTimeToReachTop * durationMultiplier;
    _currWave++;

    // if there have been enough waves, increase max balloon count
    if (_currWave % increaseMaxBalloonCountEvery == 0)
        _maxAtOnce = (int)(_maxAtOnce + 1);
}
Finally, the wave characteristics are updated - increase the speed of the balloons by applying the duration multiplier, increase the wave number, and potentially increase the maximum number of balloons that can be launched for the next wave.
3. Handling balloons being tapped and missed
We've seen from the previous section that balloons are generated with a TouchHelper that calls BalloonPopped when a balloon is popped, which prevents the balloon from reaching the top and calling the MissedBalloon method. As for what's in the actual methods:
| In `BalloonPopped`, we add to the score and player's life count, update the labels and background colour, then animate away the popped balloon. | In `MissedBalloon`, we do similiar things - take away a life, then update labels and background colour. However, we also need to check whether this missed balloon has taken lives to zero, and if so, call the `GameOver` method. |
|
|
4. Game Over and resetting
The difficulty of meetup-pop increases very quickly, making it basically impossible to beat after just a few waves (perhaps not the best design decision). We need a way to signal game over and allow the player to restart the game. In Meetup Pop, this all happens in the GameOver method. There isn't anything that we haven't seen before in this method - it sets the _gameOver flag to true, which triggers the massive balloon wave, then places a Game Over overlay on the screen and waits for the player to tap to restart the game. One point worth covering is that in Meetup Pop, we can simply transition into a new instance of our GameScene to restart the game, rather than worrying about re-initialising variables and returning to a clean state from within the current scene:
// add touch listener, restart game on touch
var touchListener = new CCEventListenerTouchAllAtOnce()
{
    OnTouchesBegan = (touches, args) =>
    {
        this.Director.ReplaceScene(new CCTransitionRotoZoom(.5f, GameLayer.Scene(this.PeopleTextures, this.Window)));
        this.RemoveAllChildren(true);
    }
};

this.AddEventListener(touchListener);
Note that you can not pass the same instance of your scene into ReplaceScene - that doesn't make sense and will cause Bad Things to happen.
Phew!
And that covers the majority of Meetup Pop! It's clear this game won't be charting in the App Store anytime soon, but it did demonstrate a bunch of the fundamentals. The last piece I promised out of this was the set of helper extension methods that were referenced through the code samples - I'll make sure these come in a later post :)